Munchkins and Mayhem

Munchkins & Mayhem

A Kids Crafts Blog

Monday, April 30, 2012

How it Rains Experiments


Fill a clear cup with water and put shaving cream on top for a cloud. Explain that when clouds get really heavy with water, it rains! Then put blue food coloring on top of the cloud, and watch it rain. Kids will see the weight of the new water (blue food coloring) and how the cloud can not support it.

Good for ages 5 and up.


Weather wiz kids shares their version of the make it rain experiment for kids using a glass jar, plate, hot water, ice cubes and index cards.  The cold plate and the warm air in the jar create moisture and water droplets form. 

Good for ages 10 and up.

Get the instructions here:


A rain experiment for the younger set is to have a bowl of cotton balls and a bowl of water.  Let kids drop the cotton in the water and see how it soaks up and then squeeze out the water to make it rain.  It's a great sensory experience too.  

Sunday, April 29, 2012

Orange Bird Feeder


HGTV has a tutorial to make a natural bird feeder using a hollowed out orange, peanut butter, oats and sunflower seeds.

Good for 6 and up.

Get the instructions here:
http://www.hgtv.com/gardening-club-bird-feeders/package/index.html


Sheri silver has the same tutorial but puts in a more attractive feed for the birds.

Get the instructions here:
http://sherisilver.com/2012/11/27/dailybuzz-moms-9x9-kids-holiday-crafts/

Saturday, April 28, 2012

Plastic Bead Bowl


Plastic beads are great for melting into a new design, especially something functional such as a bowl or coaster, but beware they fall apart very easily.  You can get them at any craft store.

1.  Find a bowl that can withstand oven temperatures and wipe with a layer of oil.
2.  Place beads into the bowl making sure there are no gaps and that they lie even and flat.
3.  Put them in the oven at 200 degrees checking every 5 minutes to see if they've fused together.
4.  Let cool completely and remove.

Good for ages 9 and up.


Friday, April 27, 2012

How to Make a Boomerang


Man made diy has instructions for making an eco-friendly boomerang out of recycled cardboard boxes. It doesn't look like a traditional boomerang.  They say quad-boomerangs are the easiest for beginners to use.

Good for ages 9 and up.

Get the instructions here:
http://manmadediy.com/davideriknelson/posts/1568-how-to-make-diy-boomerangs-from-recycled-boxes

Thursday, April 26, 2012

Indoor Fireworks


The homeschool den has a nifty science experiment using oil, water and food coloring showing how oil and water don't mix as the food coloring tries to make it's way through.

Good for ages 6 and up.

Get the instructions here:
http://thehomeschoolden.blogspot.com/2011/04/oil-and-water-fireworks-science.html


Meet the dubiens makes red ones and calls them lava bottles.

Get the instructions here:
http://www.meetthedubiens.com/2011/01/lava-bottles.html


Education explains the science of chromatography -- how oil and water don't mix.

Get the instructions here:
http://www.education.com/activity/article/Chromatography_liquid_fireworks/

Wednesday, April 25, 2012

Leaf Skeleton Project


Esprit cabane has a tutorial on how to remove the pigment of a leaf using washing soda.  Make sure to use hearty leaves that can stand up to the washing.

Good for ages 12 and up.

Get the instructions here:
http://en.espritcabane.com/eco-crafts/skeleton-leaves.php

Tuesday, April 24, 2012

Water Cycle Experiment


Corkboard connections has instructions for how to make a mini water cycle using a rotisserie chicken container, rocks, grass, and water contained within aluminum foil. Not sure what the reaction is but that's part of the fun.

Good for ages 10 and up.

Get the instructions here:
http://corkboardconnections.blogspot.com/2011/10/mini-water-cycle-fun.html

Monday, April 23, 2012

Pasta Beads


My name is snickerdoodle has a great alternative to plastic beads. Using ditalini, alcohol and food coloring she makes her own environmentally friendly and safe pasta beads.

Good for ages 3 and up.

Get the instructions here:
http://www.mynameissnickerdoodle.com/2010/02/colors.html


Serving pink lemonade strings them on yarn and makes necklaces.

Get the instructions here:
http://www.serving-pink-lemonade.com/2012/05/pasta-beads.html 


Jellyfish jelly adds paper leaves in between each bead to make a jungle safari inspired necklace.

This site is no longer available.


Alisa burke makes shiny gold ones.

Get the instructions here:
http://alisaburke.blogspot.com/2013/05/noodle-beads_28.html?spref=pi

Sunday, April 22, 2012

Earth Day Craft Hand Print Earth Plate


Meet the dubiens has a cute, simple craft idea for earth day. Using a paper plate, paint and glitter kids can create their very own planet earth.

Good for ages 5 and up.

Get the instructions here:
http://www.meetthedubiens.com/2010/04/lets-celebrate-earth-day.html

Saturday, April 21, 2012

Earth Mosaic


Make and takes has an Earth day project using round paper and cut up Earth colored squares for kids to make a mosaic of the Earth. She even provides the Earth pattern to help keep the colors in place.

Good for ages 5 and up.
Get the template here:

Friday, April 20, 2012

Tissue Paper Toilet Paper Roll Tree for Earth Day


A cute craft for Earth day making a tree out of a toilet paper roll, green tissue paper, Easter grass and a sheet of construction paper to glue it on. 

Good for ages 4 and up.


Make an autumn inspired tree with a toilet paper roll and small pieces of tissue paper from easy preschool crafts.

Get the instructions here:
http://easypreschoolcraft.blogspot.com/2012/08/fall-tree-toliet-paper-roll-craft.html


I heart crafty things makes an extra large tree using cut up magazines for the leaves.

Get the instructions here:
http://www.iheartcraftythings.com/2012/04/earth-day-inspired-tree-craft.html

Thursday, April 19, 2012

Magic Drink Potion


Mrs. happy homemaker has a magic drink potion using sprite and kool aid ice cubes. As the potion melts the drink changes colors and flavors.

Good for ages 6 and up.

Get the instructions here:
http://www.mrshappyhomemaker.com/2011/10/magic-potion.html

Wednesday, April 18, 2012

Mess Free Finger Paint


Feeling lovesome has a terrific idea for mess free finger paint. Simply place it in a see through ziploc bag, instead of on a plate. Kids will still be able to feel the texture and blend the paints without the mess.

Good for ages 2 and up.

Get the instructions here:
http://feelinglovesome.blogspot.com/2012/01/fun-with-paint.html

Tuesday, April 17, 2012

Ice Fishing


Disney's family fun has instructions for how to pick up an ice cube with a string demonstrating the effect of salt on ice. All you need is a glass of water, an ice cube, salt and string.

Good for ages 4 and up.

Get the instructions here:
http://familyfun.go.com/crafts/crafts-by-type/educational-craft-activities/science-projects/life-an-ice-cube-with-string-829549/

Monday, April 16, 2012

Mini Bubbles Bubble Blower

Bhoom play has a very unique idea for creating a bubble blower.

Instructions:
- Cut off the top of a plastic bottle.
- Cut several straws into 1.5 inch pieces. Cutting enough pieces to fill the width of the mouth of the bottle.
- Bind together the straws with a rubber band and stuff them into the top of the bottle, ensuring each straw is aligned.

Although not listed, consider taping the bottom (cut edge) of the bottle for safety.

Good for ages 6 and up.

Get the visuals here (instructions are in Thai):
http://bhoomplay.wordpress.com/2010/09/13/bubbles_blower/

Sunday, April 15, 2012

How to Make a Paintbrush


Teach preschool has a cute idea for how preschoolers can make their own paint brushes using construction paper as the base and yarn, bubble wrap, feathers and pipe cleaners for the brushes and tape to bind it all together.

Good for age 4 and up.

Get the instructions here:
http://www.teachpreschool.org/2010/07/handmade-paint-brushes-for-preschool/

Saturday, April 14, 2012

Explosion Science Experiment


Home school journal berg blog has a nifty science experiment demonstrating how to make a ziploc bag pop using baking soda and vinegar to create a chemical reaction.

Good for ages 6 and up.

Get the instructions here:
http://homeschooljournal-bergblog.blogspot.com/2011/07/summer-fun-43-fizzy-explosion-bags.html


Fun at home with kids uses liquid watercolors and makes an explosion for each color.

Get the instructions here:
http://www.funathomewithkids.com/2014/08/how-to-get-best-baking-soda-and-vinegar.html

Friday, April 13, 2012

Toothfairy Origami Money Heart


Instructables hosts a tutorial for how to create a folded heart out of paper money that houses a quarter inside. Another cute way to fold tooth fairy money.

Get the instructions here:
http://www.instructables.com/id/Dollar-Bill-Oragami-Heart/step8/The-Quarter-Trick/

Tooth Fairy Money Origami Butterfly


Money is extra special when it comes from the Tooth Fairy.  Creative simplicity makes it extra special by folding it into the shape of a butterfly adding a really sparkly pipe cleaner for the antennae.  You could also add some light glitter glue to make the wings sparkle as well.

Get the instructions here:
http://creative-simplicity.blogspot.ca/2012/06/one-of-my-favorite-things-that-i.html

Tooth Fairy Origami Money Box


A wonderful gift from the tooth fairy.  This origami box made from 2 dollar bills contains a tiny note and some coins and even glitter, because after all it came from the tooth fairy. 

The instructions for the box are no longer available on the original site, but can be found on archive.org.   They're reproduced here for stability. 

This box is made from two new crisp bills. Older, softer ones are harder to work with. For this design to work, the folds should be fairly  precise, and perpendicular to the edges of the bill in order to make a rectangle. 


Lay the first bill face up. Fold the bill in thirds lengthwise. Gently unfold these folds, referred to as third folds they will be used later.


Fold the bill top-to-bottom just to the right of the portrait, then unfold. Repeat just to the left of the portrait. These are portrait folds. Note that the third folds oppose (are perpendicular to) the portrait folds.


Starting at the top left corner, close the top third fold to about 90 degrees. Lift the right edge of the bill to the right of the right portrait fold up while holding the top third fold in place, allowing the third fold to close completely to the right of this corner.


 Inside this corner will be a remaining portion that you will crease along the natural 45 degree line to complete the corner.


Complete the previous step for the other three corners. You will have two "tabs" sticking up on the left and right sides.

For each tab, pull it inside the box, folding so that the edge of the box is pulled slightly over inside the fold. For the two other sides, evenly fold over the edge of the bill.

You should now have an open box.


Fold the second bill to make the cover lengthwise so that the width matches the widest portion of the open box just made. You need two width folds


Holding one end of the cover across the bottom of the open box, find the point which matches the corner of the open box and fold at that point.

After folding, open the fold to 90 degrees, hold the cover back in place, and find the point for the next corner of the open box as the cover wraps around. These are wrapping folds  Repeat this process until the cover wraps over itself (four folds). 

There is now one very long side to the cover. Fold back the long side so that is just a bit shorter than the first side.This is called the end cover fold.


The end cover fold puts the remainder of the long side inside the wrapping folds. Refold the wrapping folds holding the long side in place to crease it at the correct points.


 Slide the open box inside the cover before closing the cover tightly, or close the cover with the open box already inside. In either case you are done.


Free Printable Tooth Fairy Letters, Invoice, Certificate and Receipt


Free printable certificates has an adorable certificate from the tooth fairy. Although not a craft, it is an adorable way to commemorate and personalize a visit from the tooth fairy.

Get the pdf template here:
http://www.freeprintablecertificates.net/showcover/tooth_fairy_certificate_silhouette


How does she has tooth fairy invoice to leave for the tooth fairy. The two could be used in combination for a great memento.  She has a different version for girls and for boys. 

Get the template here:
http://www.howdoesshe.com/free-tooth-fairy-printables


Handmade charlotte has both a to and from version of a tooth fairy note, one for the child to complete and one for the tooth fairy to leave behind.  

Get the template here:
http://www.handmadecharlotte.com/free-printable-tooth-fairy-notes/

Jaded blossom has a cute idea for a tooth fairy receipt here:
http://www.jadedblossom.com/2012/06/release-day-4-tooth-fairy.html 


Behance has a cute receipt idea too:


Get the templates here:
http://www.toothfairyletter.net/


Oh my gluestick share a file to print a whole bunch of tooth fairy receipts at a time.

Get the template here:
http://ohmygluestick.blogspot.com/2012/11/free-tooth-fairy-tooth-receipt-by-oh-my.html

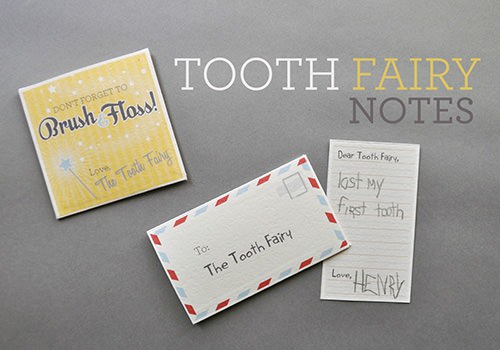
Intermittent blogger has a free template to print a mini tooth fairy letter and envelope.

Get the template here:
http://intermittentblogger.wordpress.com/2012/11/16/with-love-from-the-tooth-fairy/

Tooth fairy letter has a whole bunch of tooth fairy letters and coloring pages and other cute notes form the tooth fairy.

Free sample momma has a tooth fairy letter too:
http://www.freesamplemomma.com/free-tooth-fairy-letter/ 
 

Tooth Fairy Books for Inquisitive Kids

Related Posts Plugin for WordPress, Blogger...
I would love to have you Follow us on Facebook if you aren't already